How to paint Games Workshop miniatures? In this tutorial, we will show you a number of painting techniques for decorating your Citadel miniatures. In this new guide we will see which steps to follow to paint your wild Warg models!
Welcome back to Painting workshop by techigames! After the previous tutorial on the King of the Dead, which you can view on this page, we are back with a new guide in which we will see how to paint your own models of Wild wargs, with very simple techniques using i Citadel colors and therefore be able to expand your collection of miniatures Games Workshop to undertake the Strategic Battle Game in Middle-earth. In the next tutorial instead we will illustrate how to decorate the Orcs Cavalcawarg of Isengard, in order to position them on their werewolves and then complete these models.
We remind you that the miniatures, the colors and all the tools for modeling are available on the website www.games-workshop.com.
Tutorial 36: Wild Wargs - How to paint Games Workshop (Citadel) miniatures
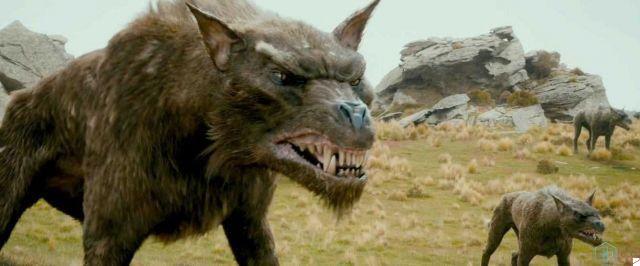
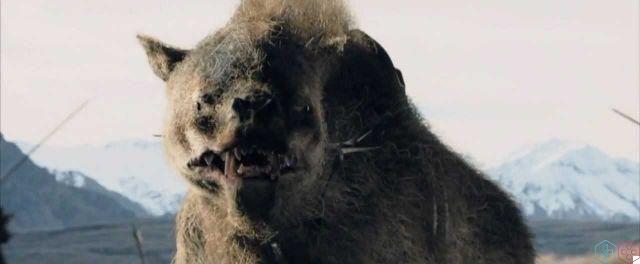
I Wild wargs they are monstrous and ferocious beasts, endowed with an evil instinct. They were raised by Sauron with the aim of wandering in Middle-earth to sow panic and death among the Free Peoples. In the film "The Two Towers" they are sent by Saruman the White in the expedition against the people of Rohan, to massacre the population intent on reaching Helm's Deep in search of shelter. However, Theoden and the Rohirrim, aided by Aragorn, Legolas and Gimli, manage to win against these evil creatures.
If you are interested in more information on wild wargs we refer you to the Wikipedia page.
To know the different basic painting techniques, useful for all Games Workshop miniatures, we recommend that you visit this page.
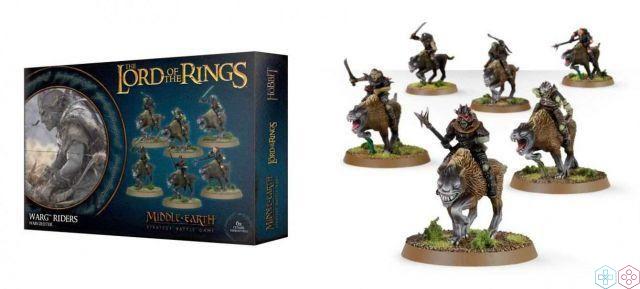
Games Workshop set with 6 Wild Wargs and Cavalcawarg Orcs
Phase 1: Cleaning and Assembling the Wild Wargs | How to paint Games Workshop (Citadel) miniatures
As introduced with the horses of Rohan, here too the first thing to do before starting to paint your plastic Warg miniatures is to gently remove them from the mold with a classic cutter, paying particular attention not to damage them. Once this is done, carefully remove any excess burrs that remain after the casting process with a utility knife. Once this is done, join the two halves of the Wargs with plastic glue and fill the joints with green stuff, in order to create continuity of material. Once this is done, fix the models onto their bases using some glue, available on the Games Workshop website or in any DIY store.
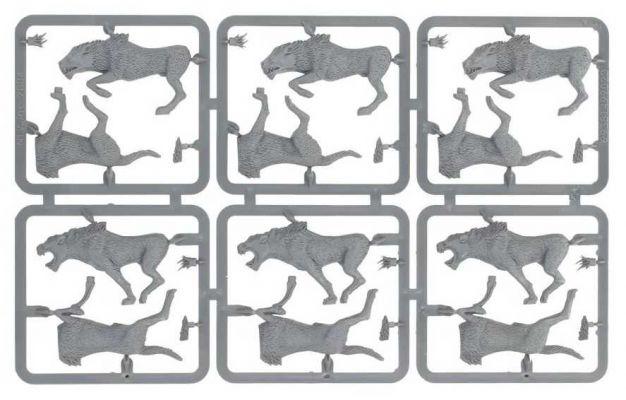
Mold with 6 Wargs in plastic
Practical tip: on each base there are two holes, one for the Warg and the other for the tuft of grass. Also, before gluing the animal, insert it in the holes to locate the exact one in order to center the model and, when you find the position you prefer, fix everything with the plastic glue.
Caution: Wild Warg miniatures are designed to be used both alone and as Orcs' mounts. In the assembly, do not glue the mane, so you can use these models both ways.
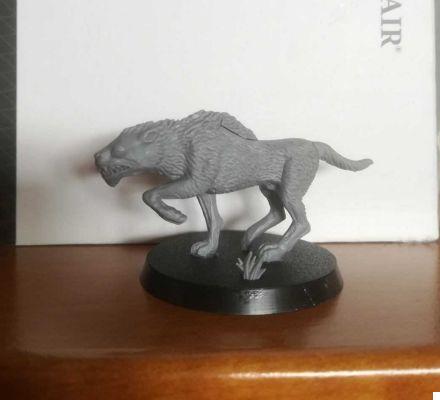
The model of the Warg at the end of the assembly
Phase 2: Wild Warg Base Color | How to paint Games Workshop (Citadel) miniatures
Once you have assembled the models of the Wargs, you will have to give a color base to have a base color to work on and to properly adhere the shades that you will apply in the next steps. Always remember that the important thing is to completely cover the material your miniatures are made of. To get an even layer of color use Citadel Chaos Black Spray, as Werewolves are characterized by relatively dark hues. Be very careful when using the spray and be sure to use this technique in well-ventilated areas.
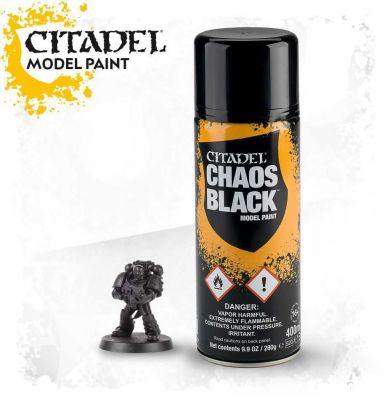
Citadel Chaos Black primer spray
Alternative: if you don't have Chaos Black spray available, use Citadel Abaddon Black in a bottle; shake the jar well to mix the color correctly, then use the brush to put a drop on the palette and add a little water to dilute it slightly, as too thick a color would be difficult to apply and ruin your miniatures, covering the details . If the color is too liquid, add a little more to thicken it.
Practical tip: If you are going to paint the Wild Wargs a pretty light shade, you can also apply a different Citadel spray such as Mechanicus Standard Gray and Corax White. Furthermore, to ensure that the color reaches even the most hidden areas, fix all the models close to each other on a sheet of cardboard with repositionable glue or double-sided tape, to be able to remove them easily after having painted them; while using the spray, rotate the cardboard, so as to apply a uniform color base on all the miniatures.
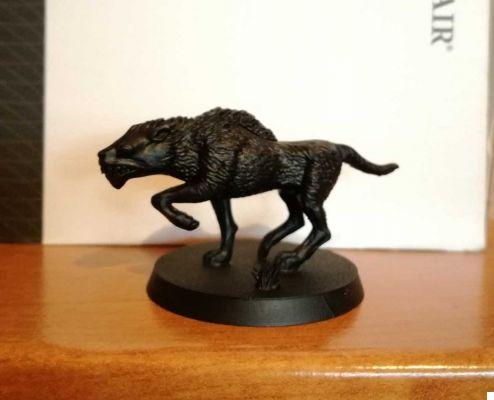
The Warg after the black primer
At this point you can start painting the details of your wild Wargs and to do that we recommend the serial painting technique, already seen for groups of models such as Dead and Uruk-hai: dealing with a group of similar miniatures, you can perform each phase on all Citadel models, then move on to the next one. This way you will work in parallel on all the Wargs, so you will complete them all together.
Step 3: Paint the Mantle of the Wild Wargs | How to paint Games Workshop (Citadel) miniatures
In this tutorial we will see how to decorate three different types of wild Wargs: brown, white and black. If you decide to experiment with a few other shades, such as light brown, you can use the same basic principle.
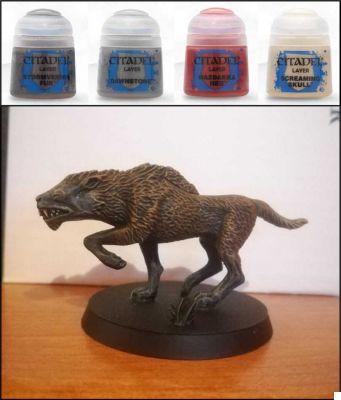
In the case of Warg with brown fur, start applying Rhinox Hide on all visible areas: this will be the base color. To make the model more realistic, it is now necessary to shade the most hidden areas and you can then apply Citadel Shade Agrax Earthshade evenly. When the ink is dry, you can highlight all the raised areas using Mournfang Brown everywhere with a dry brush, then perform a second highlighter pass with XV-88, focusing on the mane, thighs, tail and sides. Finally, create an extreme highlight with the Screaming Skull to be applied with a light hand on the mane and blending towards the sides.
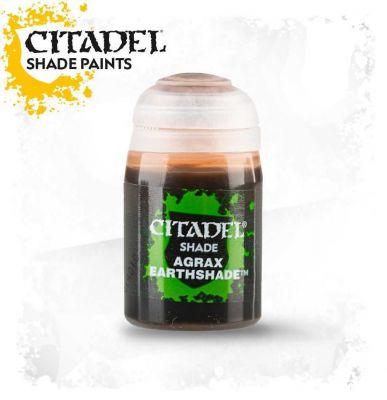
Citadel Shade Agrax Earthshade
Practical tip: if you want, you can also experiment with other Layer shades (always lighter than the base color), such as Karak Stone and in this case the extreme highlighting could be achieved with Baneblade Brown.
To paint the Wild white wargs, you can repeat the same techniques described above, but with the following colors:
- Spray: Corax White;
- Base color: pure Dawnstone or in equal proportions with Karak Stone;
- Uniform washing with Agrax Earthshade diluted with water;
- First highlight: dry brush Screaming Skull;
- Mane and tail highlighting: Dry brush Screaming Skull and White Scar
- Extreme highlighting: White Scar to be applied only on the areas to be highlighted more.
If you want to decorate the Wild wargs using a black hue, follow these steps:
- Spray: Chaos Black;
- Base color: mix in equal parts of Abaddon Black, Rhinox Hide and Mechanicus Standard Gray or alternatively pure Stormvermin Fur;
- Uniform washing with Nuln Oil diluted with water;
- First highlight: Mechanicus Standard Gray with a dry brush;
- Mane and tail highlighting: Dry brush Dawnstone
- Extreme highlighting: Screaming Skull or Ushabti Bone plus White Scar to be applied only on the areas to be highlighted more like the tips of the mane.
Step 4: Paint the Head and Paws of the Wild Wargs | How to paint Games Workshop (Citadel) miniatures
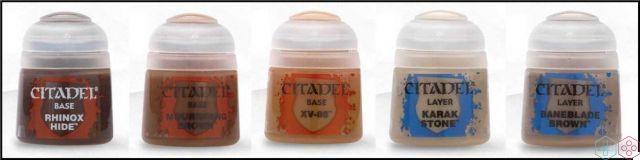
To paint the heads and lower legs of wild Wargs, you can apply Stormvermin Fur as a base color or alternatively mix Rhinox Hide with Abaddon Black and Mechanicus Standard Gray. Then, spread the Nuln Oil evenly, then highlight the raised details with a compound consisting of the base color plus a little Dawnstone. For the tuft of hair under the muzzle you can use the same techniques described in step 3, while for the jaws and claws you can first decorate the gums with Wazdakka Red (or Cadian Fleshtone), lightening them with a mix of this color with the Screaming Skull; then, detail the teeth and claws with Ushabti Bone and Screaming Skull, employing the fine point brush.
Alternatives: In the case of white Wargs, you can use a compound of Kislev Flesh, Karak Stone and Administratum Gray to decorate the face. For the black ones, basic Abaddon Black is fine, to be lightened with different layers of gray highlights, starting with Mechanicus Standard Gray and passing through Dawnstone and Administratum Gray.
Recommended Citadel Head and Leg Paints for Wargs
Step 5: Decorate the Wild Warg's Bases | How to paint Games Workshop (Citadel) miniatures
The last step to complete your wild Wargs is to decorate their sideburns: to do this, you can for example paint them totally Mournfang Brown and then apply a small amount of static grass or modeling flock with the vinyl glue, to recreate a turf. You can also add some crushed stone to give a classy effect and remind you of the terrains of Rohan. Also, remember to paint the plastic tuft of grass with Castellan Green, then shade it with Agrax Earthshade and lighten it with Loren Forest with the ruling technique.
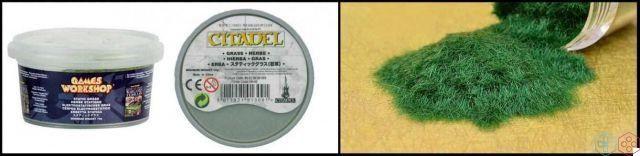
Static modeling grass
Practical tip: to apply the static grass or flock, first spread the glue on the upper part of the base, then immerse it in a jar containing the grass, so that it adheres perfectly.
Alternatively you can apply a Citadel Texture such as Stirland Mud or Astrogranite to create a rocky brown or gray effect. Whichever you choose, paint the edges of the base with XV-88 or Mechanicus Standard Gray accordingly. When the Texture is dry, gently drybrush a lighter color to highlight, such as Terminatus Stone (Dry) in the first case or Slaneesh Gray (Dry) in the second. Finally, to complete you can add the Clods of Mordheim or Middenland, in order to enrich the base with tufts of grass and very reminiscent of the wide valleys of Rohan.
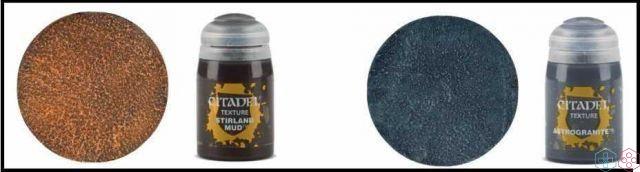
Citadel Texture Stirland Mud e Astrogranite
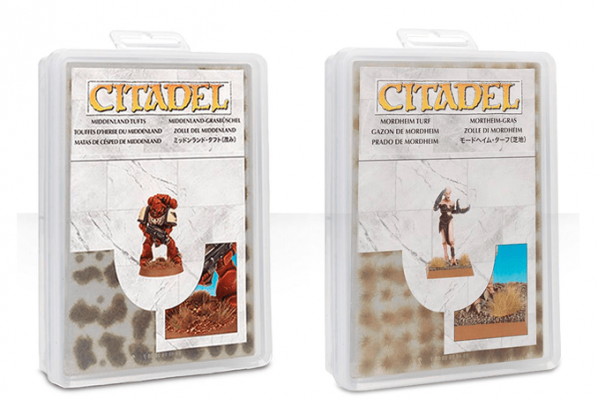
Clods of Middenland and Mordheim
Once this is done, keep your wild Wargs in a safe place for the next tutorial where we will see how to paint the Orcs of Isengard!
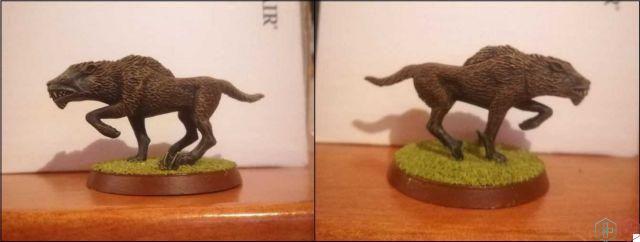
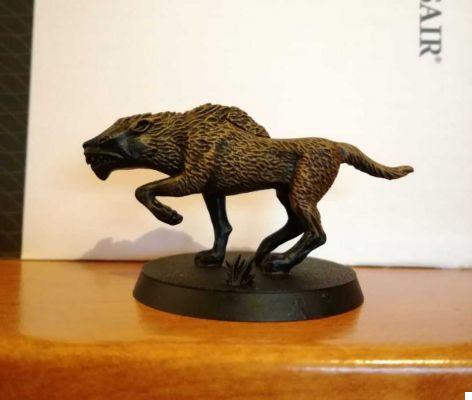
The complete Warg model
How to paint Games Workshop (Citadel) miniatures - Tutorial 36: Wild Wargs
This tutorial from the Techigames Painting Workshop dedicated to decorating Games Workshop miniatures (eg Warhammer or Lord of the Rings) also ends here. For any questions or requests we are available via the comments box below!
The Triplets next Sunday with a new tutorial!